|
by Gerald Warner, Softball
Pitching Instructor

We have
seen too many promising young pitchers ultimately get frustrated,
and in some cases quit pitching softball because they were
encouraged to do too much too quickly. Sometimes a
pitcher, a parent, or even a coach brags about how many pitches a
young pitcher can throw. Trying to learn new pitches before
you are doing the fundamentals correctly is a waste of time.
Learning to pitch takes a long time...with a lot of hard work and
practice.
Here is what we recommend as a step-by-step
skills-development plan for each of our
pitchers:
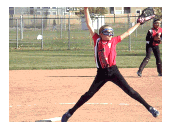
Step 1 - Develop good mechanics
a) Start by fully relaxing
your neck, arms, & upper body (relaxed muscles are fast
muscles) 
b) Let your body lean forward (full body…don't bend at the waist) as you start to
move your arm forward, and push off the rubber to help get a good
long "reaching out" stride. Your push-off and stride
will eventually be your keys to good
speed.
c) "Open" your body (facing
3rd base for a right-hander) as you go into the
rotation.
d) The arm circle must be fast and consistent
(smooth…no jerkiness) with constant arm speed
during the entire rotation; keep the arm straight (no bent elbow) the whole way
around.
e) Keep
your stride straight…toward home plate. Land with your stride
foot turned at a slight (approximate 30° to 45°)
angle, with the toe of your foot touching down near or on the
invisible line between you and the catcher.
f) Nearing the release point,
quickly "close" your body (toward the
catcher)…first the shoulder, then bring your hip through with
the ball. The hip should be closed about 45 degrees when you
release the pitch.
g) Have your wrist bent slightly
back as your arm approaches the release point, then snap
it forward as you throw the ball.
h) Let your arm follow-through loose
and naturally after the release. You will likely with finish
with your palm facing you, and perhaps coming all the way up to
touch your shoulder.
Step 2 (during the next couple of
months) - Increase your speed
Don't worry about control right
now…work on making your mechanics smooth and natural… and throw
hard. Your control will be fine when your mechanics are
correct.
Step 3 (after mechanics and speed are good) -
Accuracy & Location
Be able to accurately place your
pitch in any of the four corners. For most high school
batters, low-outside and low-inside will work best. For
power-hitters, you can occasionally use high-inside, too.
Eventually, you need to be able to pitch to a specific location so
well that you will never throw right down the
middle.
Step 4 (after Steps 1, 2, & 3 )
- Change of Speed (develop a
change-up)
To the batter, a good change-up
will look just like your fast ball…with the same motion, arm speed,
facial expression, and no "telegraphing".
Ideally, a change-up will be at least 20%
to 30% slower than your fastball
(If you throw a 50
mph fastball, the change-up should come in at a speed of 35 to
40 mph).
There are several ways to throw a
change-up (stiff wrist, circle change, back of hand,
etc.)
- Visualize in your mind how the ball will arc
and fall to the plate (low and outside)
-
Move the ball back in the palm of your hand (which
restricts the wrist snap)
- Keep your wrist "locked"
straight (no wrist snap)
- "Pop" or flip the ball out
(depending
on which style of release you use)
- Follow through low,
and toward the catcher
Step 5 - Develop
pitches that go down, up, & sideways
IMPORTANT: Again, don't try to do
too much too soon! Breaking pitches won't be valuable
unless you can throw a decent fastball accurately. So you have to
start by really LEARNING the fundamentals of pitching,
developing proper and smooth pitching mechanics, then add speed
to your fastball, and finally develop consistently good control of
your pitches. Then, we recommend that your 2nd pitch is a
good, deceptive change-up (above). Now, AFTER you have
your fastball and change-up working really well, THEN consider
working on your first
additional pitch.
DROP BALL - After
you have practiced, worked hard, and have really developed
everything in 1 through 4 (above), THEN start
working on your drop ball. Your drop will, for most batters,
be far more effective than a curve, screwball, or rise…especially
through high school. At best, the batter will "top
it"…meaning that they will keep it on the ground.
SCREW BALL and/or CURVE BALL - Like the
rise, the curve and screw are nice to have in your
repertoire to prepare for college, but get the "Big-3"
(fast, change, drop) working
first.
RISE BALL - The
rise is very difficult to perfect…it will take time…perhaps
years. After you have an awesome change-up, a good drop ball
that works all the time, and perhaps one other pitch...THEN
work on the rise.
The article above can be downloaded and printed from
Microsoft Word

Do you
want to reprint this article or use it on your website or in your
newsletter?
As long as it is not for profit,
our only requirement is that you include the following
sentence:
Article by Gerald
Warner of PitchSoftball.com
and include a reference to
this website: www.pitchsoftball.com
If you have questions or
need more information
E-mail us, or call Pitching
Instructor Gerald Warner in Colorado at (720)
200-4575
Home Page | | About Us | E-Mail
Us
Other Articles for Beginning
Pitchers | 1st & 2nd Year
Pitchers | Advanced Pitchers | Coaches and Parents | 


